This post consolidates all Life Cells locations in all maps and how to get them in Ori and the Will of the Wisp.
It includes the minimum abilities and/or spirit shards required to get fragments. Be sure to check it so you’d know if it is possible to get them with your current set of abilities and shards.
Video Walkthrough
All Life Cell Quick Overview:
| Life Cell | Where to Find It | Requirement(s) |
|---|---|---|
| Location #1 | Inkwater Marsh | None |
| Location #2 | Inkwater Marsh | Spirit Edge or Spirit Smash |
| Location #3 | Inkwater Marsh | Spirit Edge or Spirit Smash |
| Location #4 | Inkwater Marsh | Spirit Smash |
| Location #5 | Inkwater Marsh | Grapple |
| Location #6 | Kwolok's Hollow | None |
| Location #7 | Kwolok's Hollow | Dash |
| Location #8 | Kwolok's Hollow | Bash |
| Location #9 | Wellspring Glades | Burrow |
| Location #10 | Wellspring Glades | Firemoth’s Delight + Blue Moon + Bash + Grapple Or Use Launch |
| Location #11 | Wellspring Glades | Grapple + Dash |
| Location #12 | The Wellspring | Grapple |
| Location #13 | The Wellspring | Grapple |
| Location #14 | Mouldwood Depths | Double Jump + Dash + Triple Jump (Optional) |
| Location #15 | Mouldwood Depths | Flash + Grapple or Defeat Mora first. |
| Location #16 | Baur's Reach | Burrow |
| Location #17 | Luma Pools | Bash + Dash + Triple Jump (optional) |
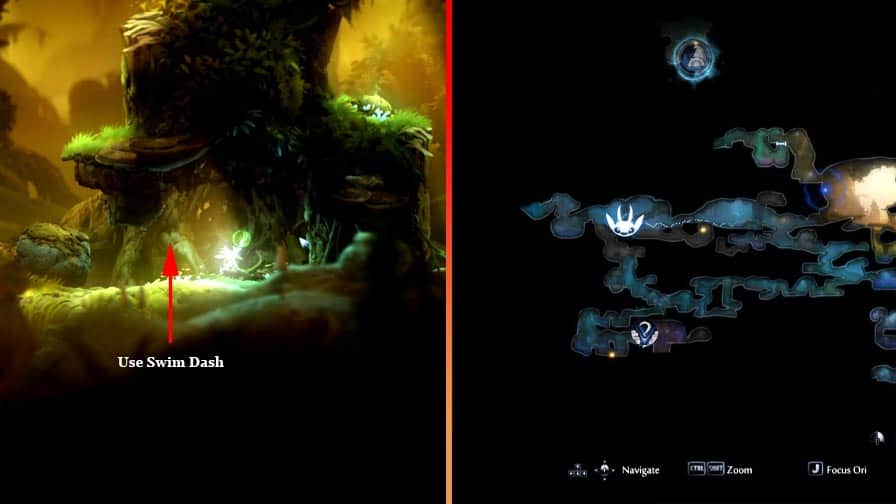
| Location #18 | Luma Pools | Swim Dash |
| Location #19 | Luma Pools | Swim Dash + Grapple |
| Location #20 | Windswept Waste | Burrow |
| Location #21 | Windswept Waste | Grapple (so you can get out of the spot) |
| Location #22 | Windswept Waste | Burrow |
| Location #23 | Windswept Waste | Burrow |
| Location #24 | Willow's End | Launch |
Inkwater Marsh:
Location #1
Requirement(s): None
If you followed my Inkwater Marsh walkthrough, you probably already got this life cell from the very beginning of the Inkwater Marsh map. But if not, follow the map pointer above and you should acquire no problem.
You can see this life cell fragment behind a boulder. Simply move it out of the way and you’re good to go.
Location #2
Requirement(s): Spirit Edge or Spirit Smash
In my Inkwater Marsh walkthrough, I’ve covered how you can get this on your way out of Howl’s Den.
If you missed it, follow the map guide in the image above.
You will need to destroy the cracked wall blocking the path to enter the area where you can get this fragment.
Location #3
Requirement(s): Spirit Edge or Spirit Smash
I also covered how to get this in my Inkwater Marsh Walkthrough. You can find this Life Cell Fragment just before you exited Howl’s Den. It’s the same area where a pile of bones was blocking the area.
Anyway, just follow the map indicator. It is hidden behind a cracked wall so you will have to break it using Spirit Edge or Spirit Smash.
Location #4
Requirement(s): Spirit Smash
This fragment is located on the platform below the combat shrine when doing the Inkwater Shrine Rumor quest.
Go to the position as indicated in the map above. Destroy the cracked bridge using Spirit Smash. You can get the life cell fragment in the platform below it.
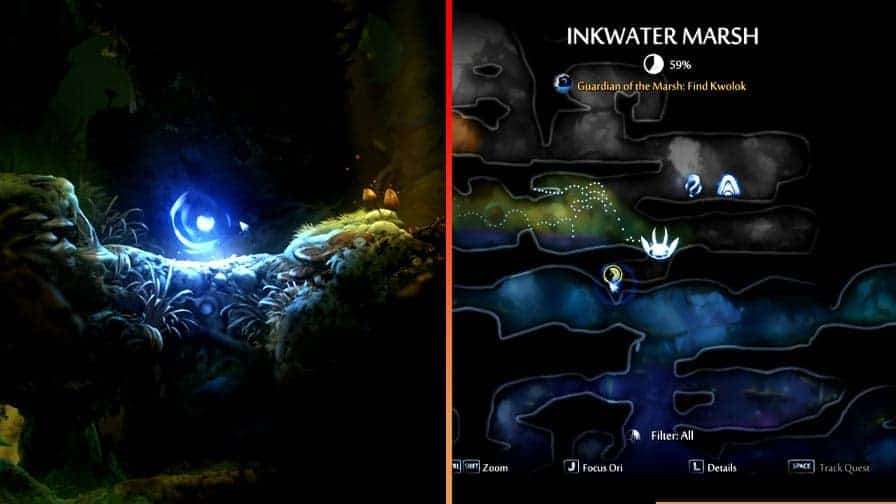
Location #5
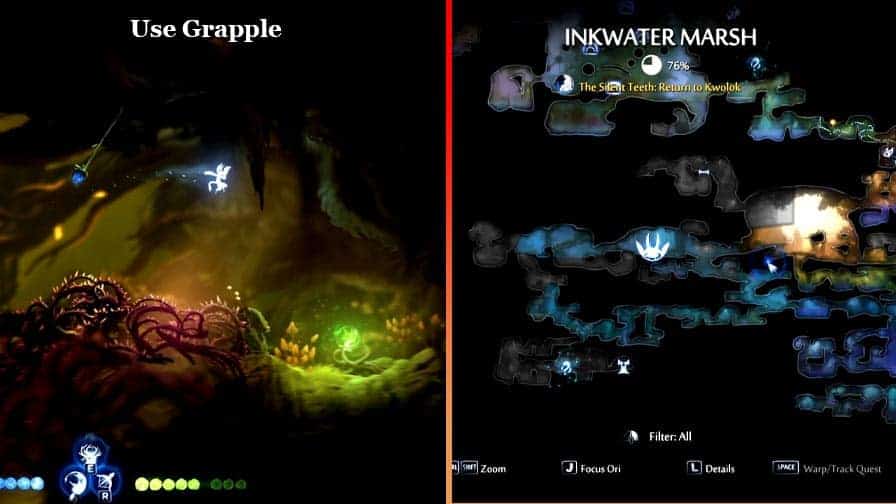
Requirement(s): Grapple
You can only acquire this life cell once you have purified the poisoned water by clearing the Wellspring map. And once you got the Grapple ability, you can go back to the starting point of Inkwater Marsh where you’ll find a new Spirit Well.
Just move a little to the right and you should see a blue plant where you can use grapple and find the hidden life cell above.
Kwolok’s Hollow:
Location #6
Requirement(s): None
You can find this fragment on the platform above the boulder trap at the beginning of the Kwolok’s Hollow map.
To get there, activate the boulder trap without getting crushed then jump on the boulder to gain access to the upper platform. To your right, you should find the Life Cell Fragment.
Location #7
Requirement(s): Dash
You can find this in the same area where the Spirit Trial Altar in Kwolok’s Hollow is. To get there, you will need to climb the upper area at the left of the blue jump pad.
You will need to have the Dash ability to reach it.
Location #8
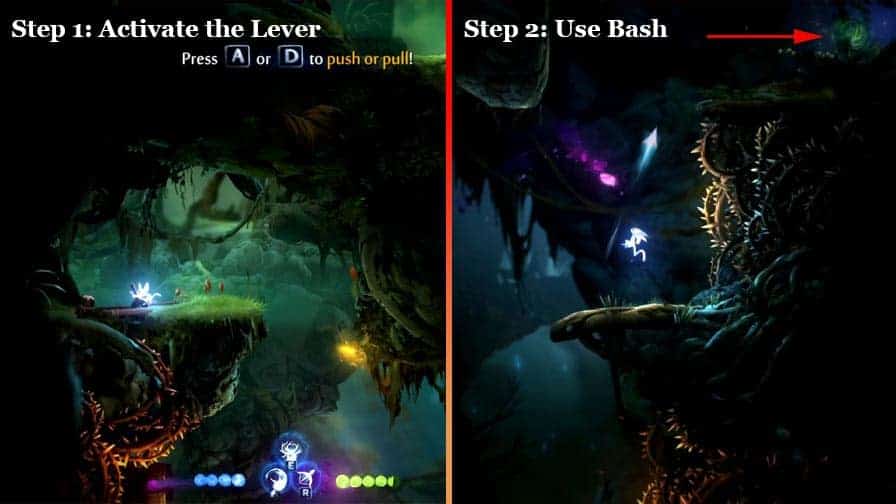
Requirement(s): Bash
To gain access to this area, you first need to pull the lever above the jump pad near the area you found the Bash ability (it’s the area above it).
That platform is initially blocked by purple rocks. Redirect the purple projectile to those rocks to destroy then pull the lever.
Go to the new path it opened and go all the way to the top. You will need to use Bash to the projectiles fired by the Slug monsters to get there.
At the very top platform, you should find the Life Cell Fragment.
I have also described this in more detail on the Splinter Spirit Shard section of the Kwolok’s Hollow walkthrough.
Wellspring Glades
Location #9
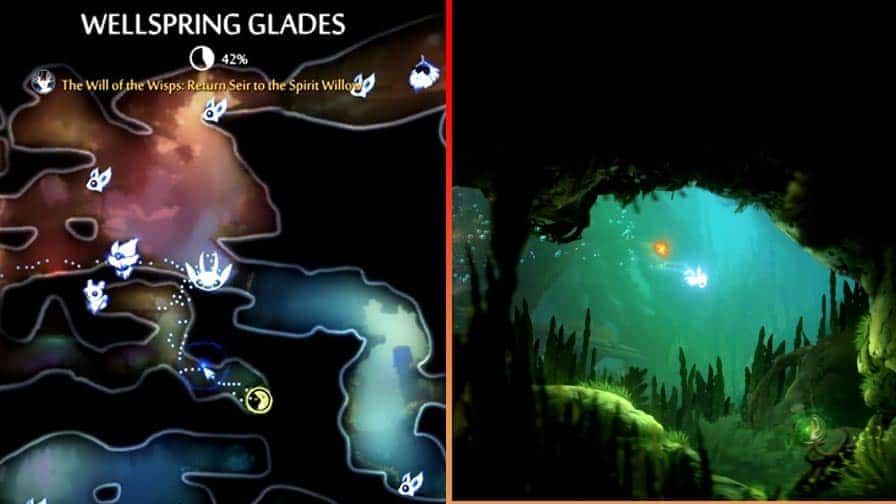
Requirement(s): Burrow
Once you acquire the Burrow ability, head to Tuley’s location. Below him, you should notice a little gap of sands. Use the burrow ability to head down and swim your way down until you notice another gap of sands.
Beyond it, you should find the hidden life cell.
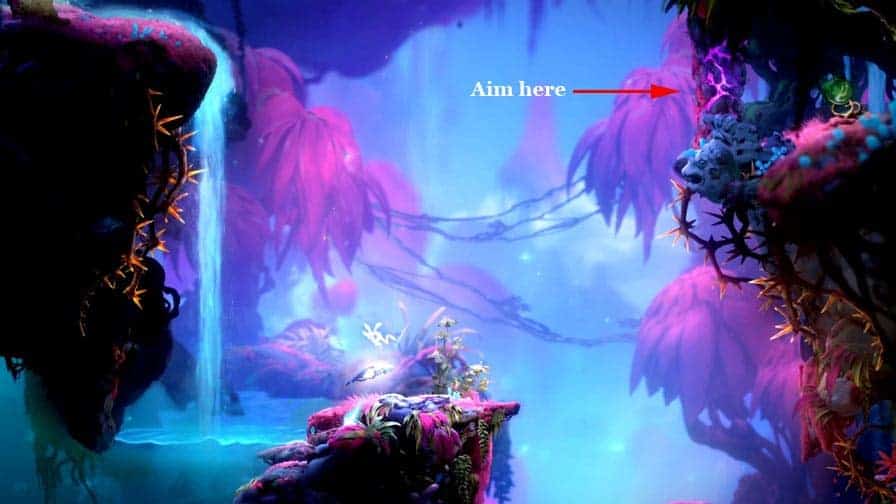
Location #10
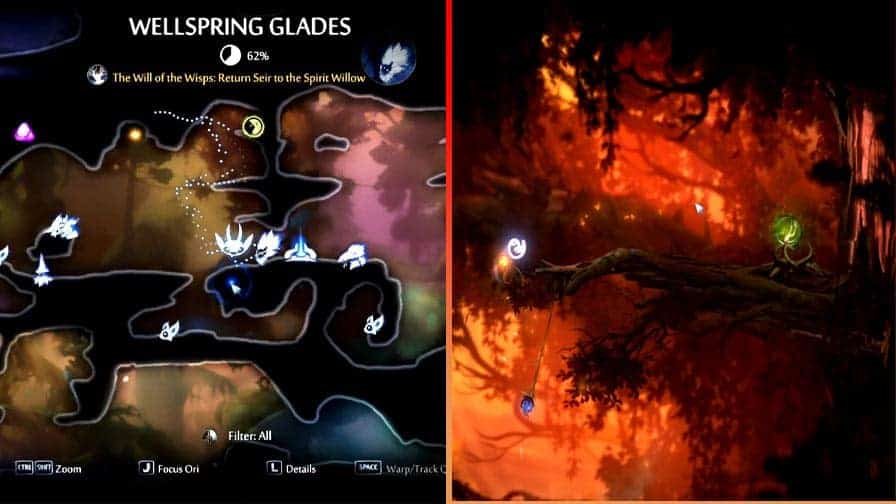
Requirement(s): Firemoth’s Delight + Blue Moon + Bash + Grapple Or Use Launch
There are two ways to get this one. The easiest way is to wait until you get the Launch ability then just use it to reach the highest platform as indicated in the screenshot above.
But if you want to get this a little earlier in the game, you can do so once you have the Bash and Grapple ability. You will also need to plant the Firemoth’s Delight and Blue Moon seeds from Tuley. Both are mysterious seeds that you can get from The Wellspring and Mouldwood Depths respectively.
Then go to Grom and to his left, you should find a platform where you can jump unto the Firemoth’s Delight plant and use bash so you can reach the Blue Moon plant. Use Grapple so you can reach the higher platform above the plant.
Next, you should find another Blue Moon plant northeast. It’s the one located a little above the Moki NPC. If you use Grapple, you should find the platform holding the Life Cell.
Location #11
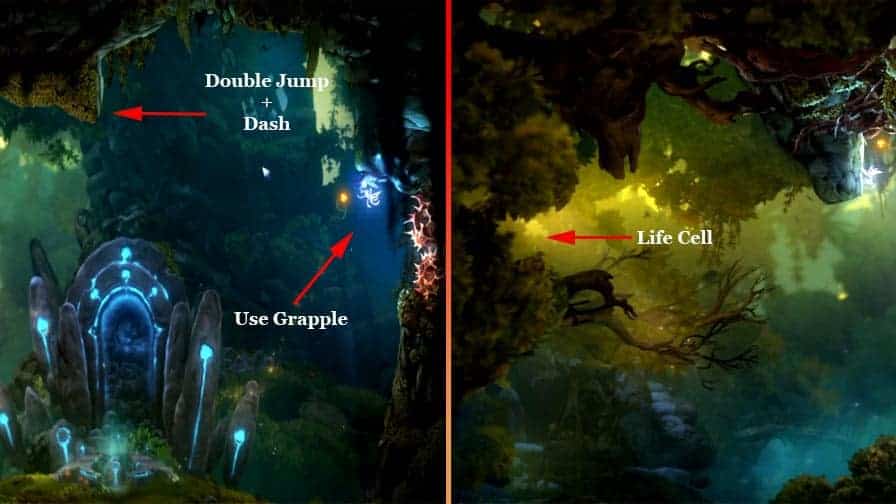
Requirement(s): Grapple + Dash
You can find this in the Combat Shrine near the entrance of the Wellspring map.
From the right of the combat shrine, you should see a blue flower where you can use the grapple ability.
And from there, climb up and jump to the next wall you’ll see on your left. You will need to time your double jump and dash perfectly so you can cling to the walls.
Do this two times and until you see a branch and a seemingly dead-end.
It’s not actually a dead-end but rather, a hidden location where you can find the Life Cell.
The Wellspring
Location #12
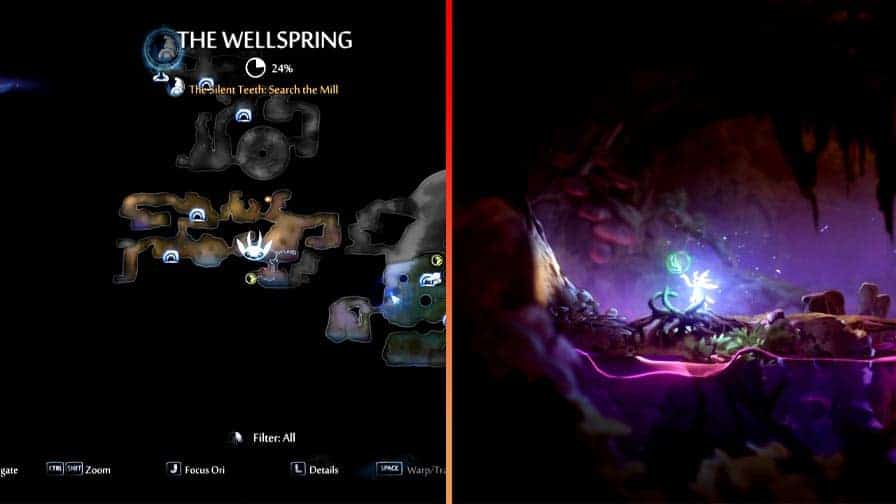
Requirement(s): Grapple
To get this one, go to the area indicated in the map screenshot above. Then move to the area below where you’ll find a hornet’s net.
To your left, you should find a huge wheel with thorns. Use your grapple ability to cling to the blue moss and work your way further to the left where you’ll find the Life Cell.
Location #13
Requirement(s): Grapple
You can find this Life Cell on the platform above Tokk. It’s the bird guy where you can get the Lost Compass side quest.
Anyway, above Tokk, you should see a blue plant. Use your Grapple ability to propel yourself upwards. Then quickly use double jump and dash leftwards where you’ll find another blue plant.
Again, use the Grapple ability and you should notice a small platform with lots of thorns just a little to the right of that second blue plant.
That’s actually a hidden location where you’ll acquire the fragment.
Mouldwood Depths
Location #14
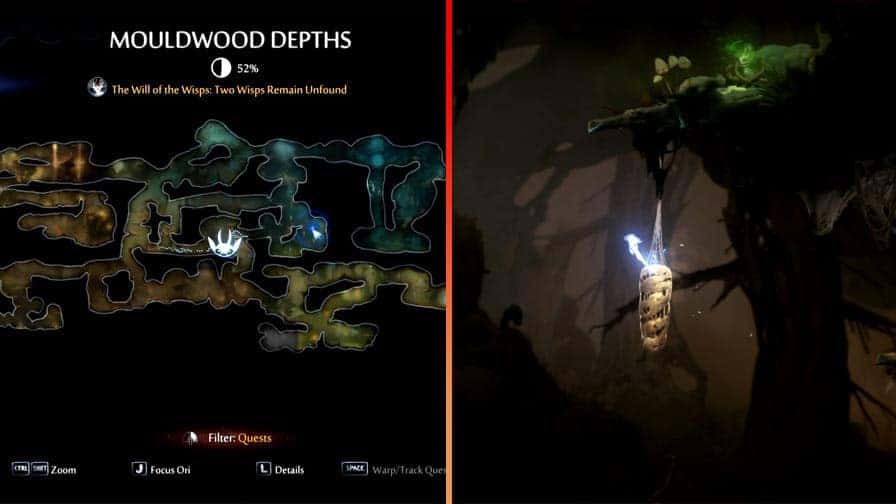
Requirement(s): Double Jump + Dash + Triple Jump (Optional)
Go to the location indicated in the map screenshot above. Then use the jump pad to get to the upper platform.
Next, jump to the spider eggs to your left then use double jump to the platform into the further left platform.
From here, quickly crawl your way up by clinging to the wall to your left. Then jump unto the small wall you’ll find at the upper right.
From there, you should find the platform holding the Life Cell to your right.
This is pretty easy to obtain after you defeated Mora (the boss in Mouldwood depth) so I suggest finishing the map first before getting it.
But getting it before defeating the boss isn’t that big of a deal either. You just have to move a little faster and match your speed with the fairy so you won’t get eaten by the darkness.
Location #15
Requirement(s): Flash + Grapple or Defeat Mora first.
You can find this one on the platform above the Spirit Trial.
But it’s not possible to get this Life Cell without the Flash ability as you will certainly get eaten by the darkness if you force it. So you’ll have to ignore this on your first run through in the Mouldwood Depth.
The other method is to get back to this location once you have defeated Mora. It’s super easy to obtain this one if you don’t have to worry about the creepy thing in the dark.
Baur’s Reach
Location #16
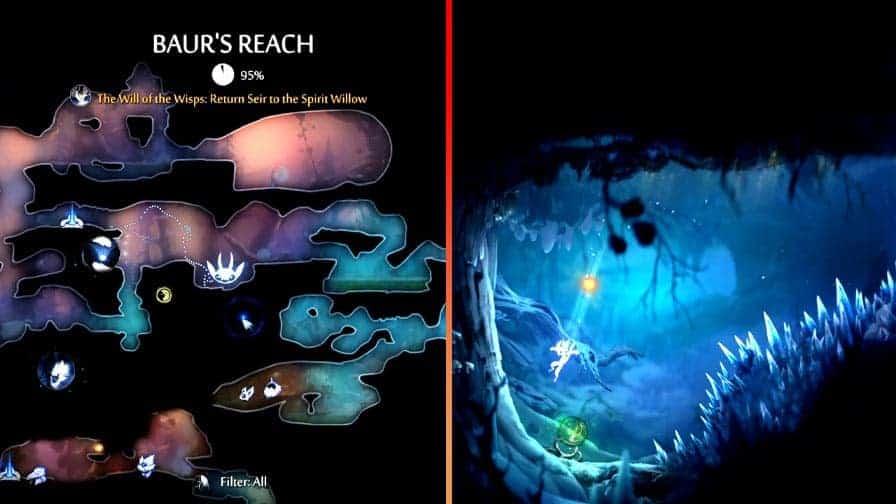
Requirement(s): Burrow
Once you obtain the Burrow ability from Windswept Waste, go back to the area indicated in the map screenshot above.
Simply use the burrow ability to get the Life Cell you’ll find beyond the pile of snows.
Luma Pools
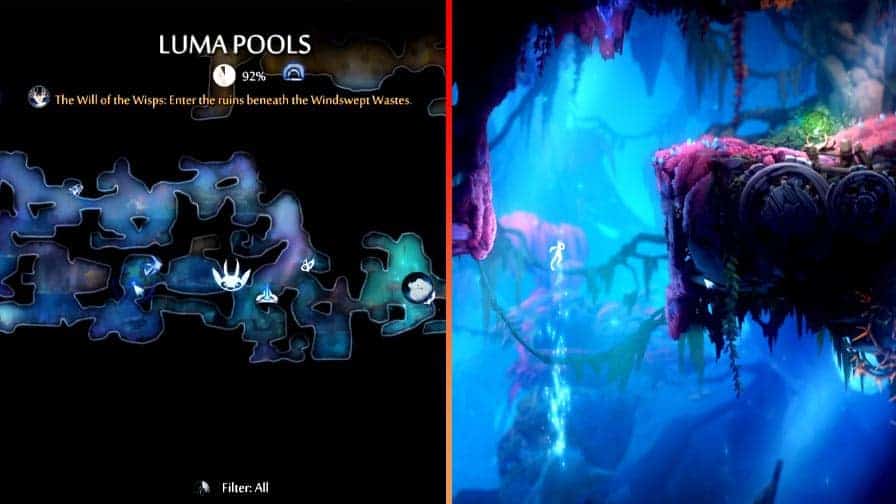
Location #17
Requirement(s): Bash + Dash + Triple Jump (optional)
To get this one, you first need to destroy the purple wall blocking the path to the Life Cell.
To do that, you’ll need to lure the torpedo monster thing out of the water. Then use Bash to redirect it to the purple wall and therefore destroy it.
Next, lure the monster again out of the water. But this time, use so you can propel yourself upwards then use the dash ability to get to the platform holding the Life Cell.
Location #18
Requirement(s): Swim Dash
Once you acquire the Swim Dash ability, head back to the location marked in the screenshot above. You will then have to defeat a couple of monsters before you can get the Life Cell.
Once you have no footing due to the increase of water level, just use the Swim Dash ability to defeat them underwater.
And as soon as you’ve defeated all the monsters, the water level will go back to normal and the blocked path will be opened.
Just use the rising bubble to reach the platform above where you’ll find the Life cell.
Location #19

Requirement(s): Swim Dash + Grapple
Head back to the location indicated in the map screenshot above.
Use Swim Dash ability so you can get the necessary height so you can use Grapple and propel yourself rightwards.
Next, you should find a gap between the thorned platforms where you can swim down.
To your left, you should find the platform holding the Life Cell. Just use Swim Dash to reach it.
Windswept Waste
Location #20
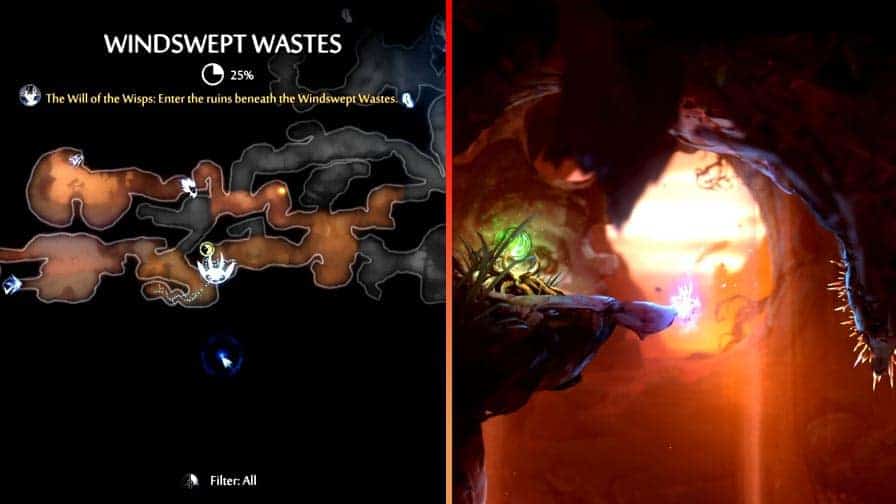
Requirement(s): Burrow
For this, just go to the marked spot indicated on the map. Use the Burrow ability on the sands above you so you can propel yourself upwards.
From there, you should see a hidden platform holding the Life Cell.
Location #21
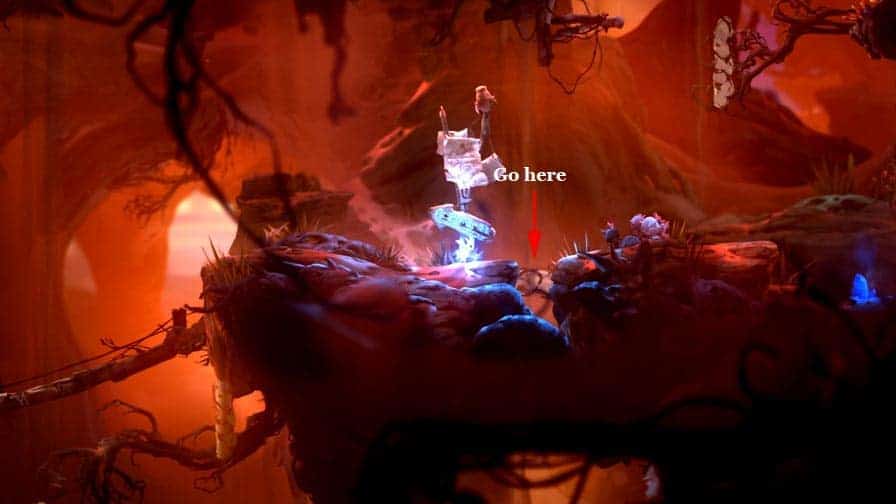
Requirement(s): Grapple (so you can get out of the spot)
The Grapple requirement is actually not needed to get to the location of the Life Cell. You will only be using it once you leave the spot.
You already have the Grapple ability by the time you get here anyway but I just thought I’d list it in the requirement instead of none.
Anyway, to get this, go to the spot indicated in the map screenshot. You should notice a small gap covered in sands next to the arrow sign.
Go there and you will drop to a hidden area.
From the spot you’ve dropped to, you will notice a blue plant to your right. Ignore it and just continue downwards. You will then notice another blue plant and it seems like it is a dead end.
It’s not. Just go drop yourself directly below the second blue plant and you’ll discover a hidden area. To your left, you should find the Life Cell.
Location #22
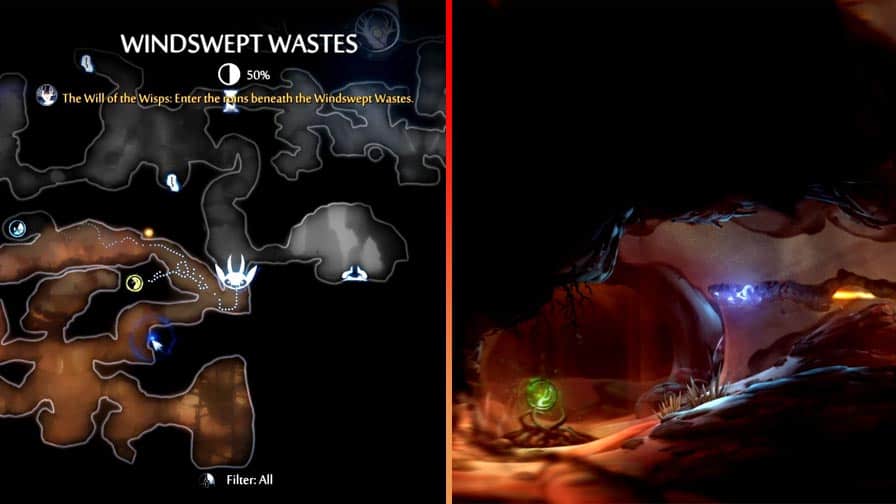
Requirement(s): Burrow
This one is another hidden area. Go to the area indicated in the map screenshot above. If you haven’t noticed already, I have been including the “footprints” on every map screenshot.
Just follow the footprints and you should discover the hidden area where you’ll find the secret Life Cell.
Location #23
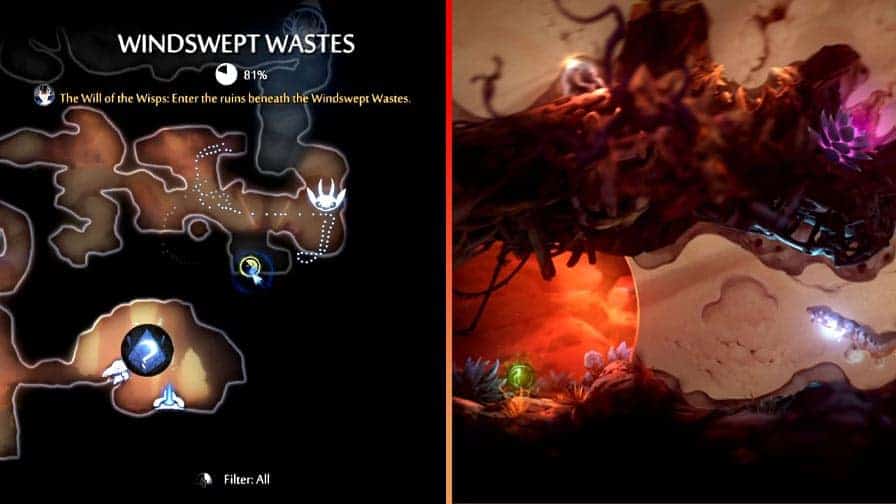
Requirement(s): Burrow
This is yet another hidden area in Windswept Waste. But this one can be easily spotted.
But to get this fragment, you will need to lure the torpedo-like monster unto the wall blocking the path to the Life Cell. You’re free to take it once you’ve destroyed the wall.
Willow’s End
Location #24
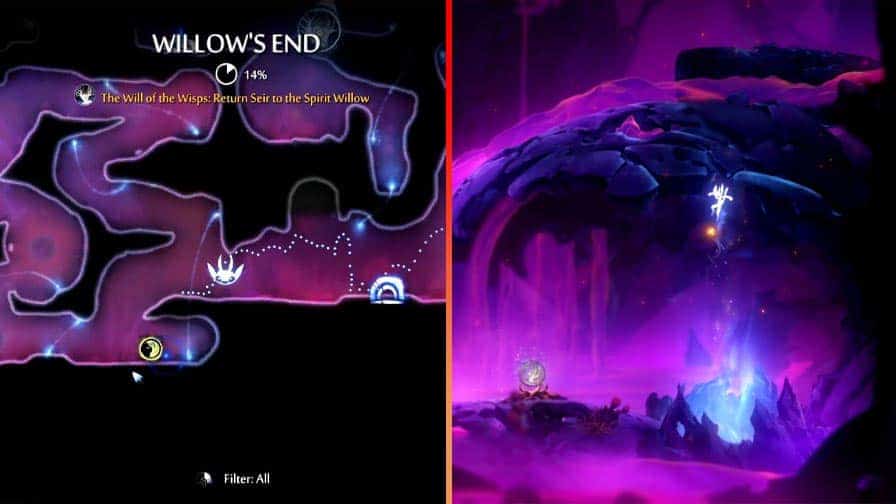
Requirement(s): Launch
To get this Life Cell, you first need to deactivate one of the Creep Heart in this map. This can be better described in the walkthrough video I made for Willow’s End, I advise checking it for better reference.
But I’ll still try to describe it here.
First, go to the furthest left you can go from the entrance.
There you should find a portal just above the sea of poison. Use Launch to reach it and you will be teleported to the portal next to it.
Use the Grapple ability to cling to the spinning wheel. Then propel yourself upwards and use Launch to get to the next portal.
Next, you should find another spinning wheel. Propel yourself upwards and use Ku’s Feather so you can get the perfect timing to move across the laser.
Once you cross it, use Grapple and cling to the spinning wheel above.
Next, you need to get the proper timing to jump north-east. Then use the Launch ability so you can cling to the wall.
To your right, you should see another laser-firing thingy. Once again, get the right timing before jumping. Ku’s Feather will help if you think you’re a little off with your timing.
Beyond it, you should see a portal just between the laser that doesn’t stop firing (to the right) and the laser-firing thingy you saw before.
Get to that portal and you will be teleported to the area beyond the non-stop laser-firing thingy.
From there, move to your left and you should see another portal. Use Ku’s Feather to avoid falling to the thorny platforms below you.
And once there, you should find the creep heart.
Destroy it and the platform holding it will crumble and will open a new path.
You should find a portal directly above from the previous position of the creep heart.
Use Launch and get teleported to the platform holding the Life Cell.