Kwolok’s Hollow is the second part of our walkthrough series for Ori and the Will of Wisp game. You can check out the Inkwater Marsh guide for the first part.
As always, this is designed so you can move as efficiently as possible so you won’t have to go back and forth between areas when solving the puzzles of the map.
Video Walkthrough
Content overview
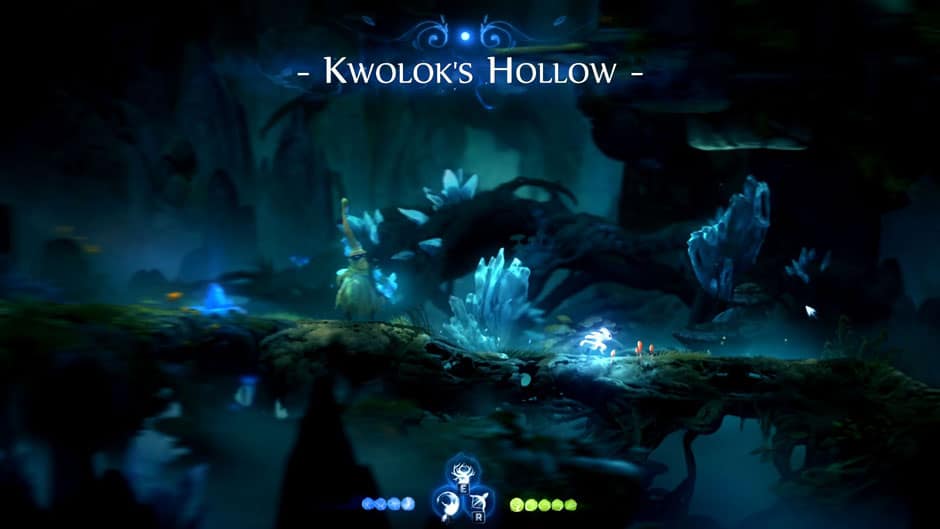
Kwolok’s Hollow Map Start
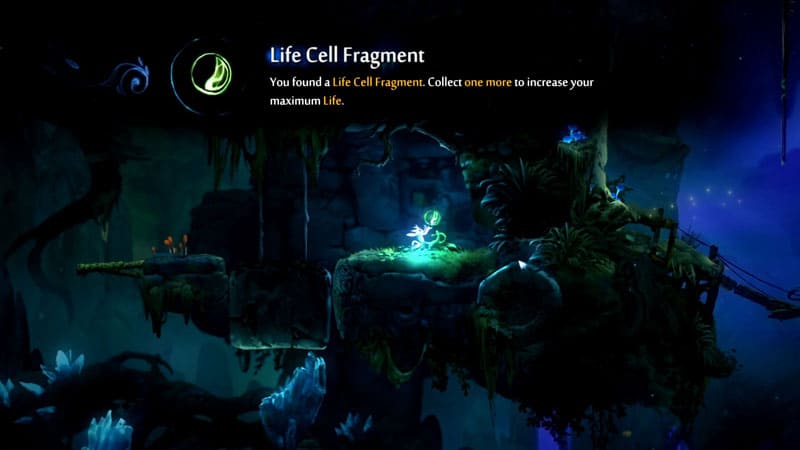
Item(s) you can get: 1x Life Cell Fragment
Once you enter Kwolok’s Hollow, you can talk to Twillen and upgrade your spirit shards. I recommend not to buy anything for now and save up so you can get the Triple Jump Spirit Shard early in the game. This will allow us to get some secret items much earlier.
Don’t worry, you can buy it before we finish this map.
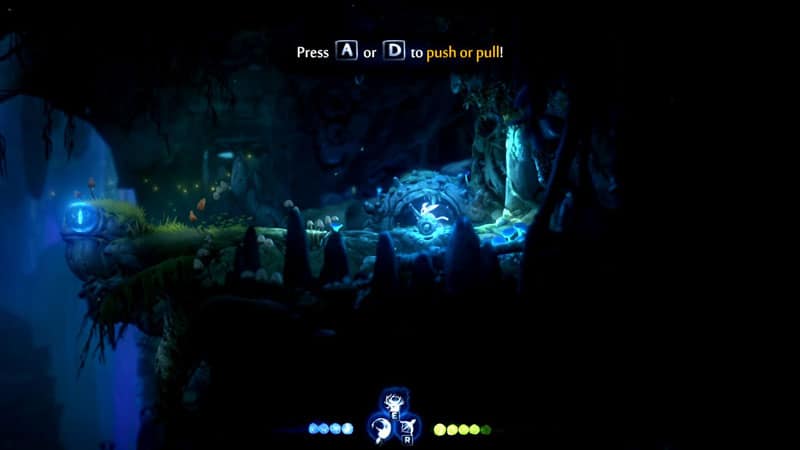
For now, just continue forward to the right. There, you will be greeted with a boulder trap. Purposely activate it and jump on top of the boulder. At the top, you will get a Life Cell Fragment. Go back down then continue moving forward to the right.
Once you’ve reached the area full of poison, use Spirit Arc and target the eye of the toad’s statue to your right (blue orb). This will blurt out a platform on its mouth allowing you to cross the other side. Be quick because it will revert back after a few seconds.
Once you’re at the other side, kill the snail monster and then jump to the higher platform to your left. From there, shoot the blue to your left so you can jump your way across the other side.
Talk to the Moki NPC to get the Spirit Trial rumor quest. But we’re not doing it for now.
Draining the Poisoned Water
Item(s) you can get: None, just something you have to go through.
Climb to the wall left of the Moki NPC and then jump across the two hanging sticks filled with vines. You’ll notice that there’s a jelly-like monster that looks about to explode at the right side platform. To safely land to the other side, jump once to the right and while mid-air, use your Spirit Arc to the exploding monster. Then use double jump to safely land.
From there, shoot the blue orb to right and quickly move to the other side so you can activate the lever. This will drain some of the poison and make the lower levels accessible to you.
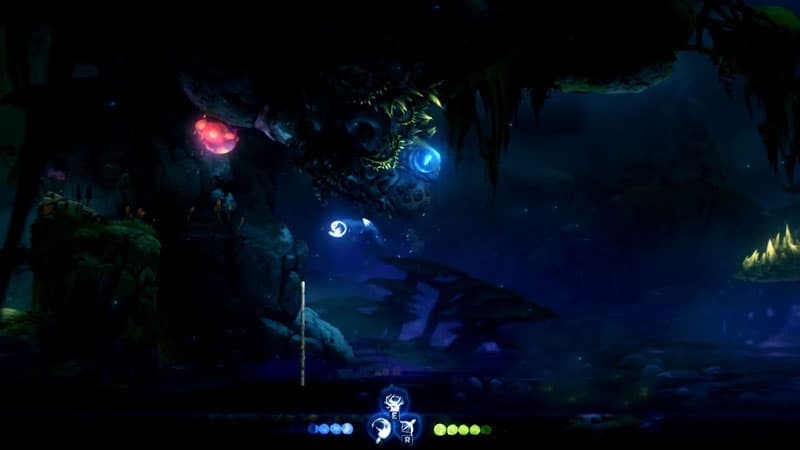
Follow the path downwards until you reach the poisoned water. To your left, you should see a blue orb, shoot it with the Spirit Arc. This time, the platform will not retract automatically like the blue orbs found at the upper level.
To go across, you will need to manually retract it and then use Double Jump to reach the pole to your left. Check out the image below.
Once there, use Spirit Arc mid-air to attack the exploding snail thingy and then jump to the next platform.
In the next area, you’ll notice 2 blue orbs above you. Ignore those for now and just continue leftwards until you reach the area with a pole. You will need to place a boulder on the switch-like platform so you can continue to the next area.
To do that, move to the top of the pole and then jump to the right so you can reach the upper platform. Jump to the hanging platform to your right and then shoot the blue orb you see at the upper-right corner. This will grab a huge boulder and then drop it to the lower area.
Go back down to the area where you see the two blue orbs. For the sake of direction, imagine yourself at the center of the two blue orbs then shoot the one to your left. Now, move the boulder about 3/4 way unto the platform, the left orb has extended. Once done, shoot the blue orb to your right and then move the boulder to the platform is extended.
Once the boulder is in the proper position, shoot the left blue orb. This will retract the platform it generated allowing the platform from the right blue orb to extend all the way to the area where the switch-like platform is. Now, all you have to do is move the boulder to the switch-like platform so you can unlock the blocked path to your left.
Continue leftwards and you will encounter a hornet-like monster. Kill it and then shoot the blue orb at the upper right corner. You have to quickly ride the platform it will generate so you can move to the upper platform to your left.
In the next area, you will notice 2 blue orbs. One directly to your left, and one above near the center. The goal is to reach the platform at the upper left corner.
First, shoot the blue orb to your left, jump to the platform it generates and then quickly shoot the blue orb at the top center. Cling to the ledge the upper-center blue orb generates then use double jump to reach the upper-left platform. You have to move fast since the platforms generated by the blue orbs will retract after a few seconds.
Once you reached the upper left platform, pull the lever to drain the poisoned water a bit more. This will make the lower levels available to you.
The Spirit Trials Rumor Quest
Item(s) you can get: 2x Spirit Light Container, 1x Energy Cell Fragment
Now that we’ve drained some of the poisoned water, we need to go back to the previous area so we can finish the rumor quest we previously took.
From the position where the lever is, move down to the lower platform just a little to your right. From there, shoot the blue orb to your lower right and then quickly use the platform it will generate to reach the upper left-most platform. You will find another lever here. Pull it and a path will open to the right.
You might also notice that this is actually the same path as before but that’s fine. Since you’ve lowered down poisoned water level, a new path will be available for you. But I’m getting ahead of myself there.
Going back, drop down, kill the fire-spitting snail and then continue moving to the right. You should see a spirit light container just before the thorns area.
To get it, shoot the blue orb to your right so you can reach the upper-right platform. From there, shoot the blue orb at the upper left corner, cling to the platform it generates and then wait for it to retract. Once it retracts, use Double Jump to reach the spirit light container. Timing is the key here. So if you fail to time your double-jump at the right moment, you’ll have to do it over.
Once you get the spirit light container your next goal is to reach the path that opened when you pulled the lever. Just do the same thing, except this time, you will have to move fast and shoot the upper-right most blue orb so you can reach the top platform.
Once you reach the top, continue to the right until you reach the area with a feral cat monster. This is the same area where you’ll find 2 blue orbs above you (the area just after the boulder you moved). From there, drop down and go to your left until you find a secret path and get a spirit light container.
Now continue moving to the right. You’ll notice that there is no poisoned water anymore. Instead, the place is now full of thorns!
Continue towards the right until you see an exploding snail monster, you should also a blue orb at the rightmost corner. Shoot both and then use the platform from the blue orb so you can cling to the wall at the lower-left corner without falling into the thorns. Now, attack the wall and get an Energy Cell Fragment.
From the position of the Energy Cell Fragment, go right and then go all the way down. There are two paths here, the left and the right. For now, proceed to the path to your right until you see some hanging poles. Jump to the pole to your right and you should see a spirit light container. Use double jump to get it. Once done, continue to move downwards until you see a path to your right.
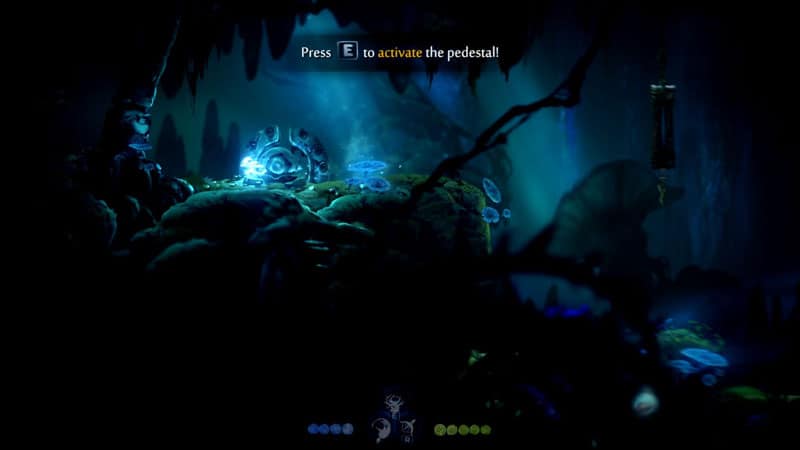
From there, continue working your way down until you reach the lowest floor. Once there, move to the left then jump and cling to the wall so you can reach the platform you see in the upper-left corner. Activate the pedestal and you should unlock the race challenge and complete the Spirit Trials rumor quest.
Now it’s time to get ourselves with a new ability.
RELATED: Energy Cell Locations across all Ori 2 maps
Dash Ability
Item(s) you can get: New Ability
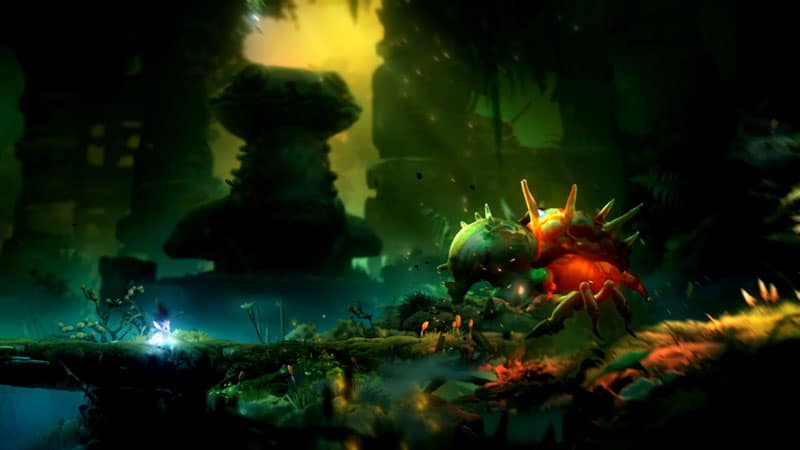
From the pedestal, go back to the lower platform then continue moving to the right. Before you reach the end, you will be greeted by a giant beetle monster. Kill it then work your way up to activate the lever at the upper right platform. This will open a path just above you.
To go there, you will need to back to the area where you activated the pedestal. Jump to the hanging log then use double jump to reach the platform to your right. Continue moving to the right and you should reach the new path that just opened.
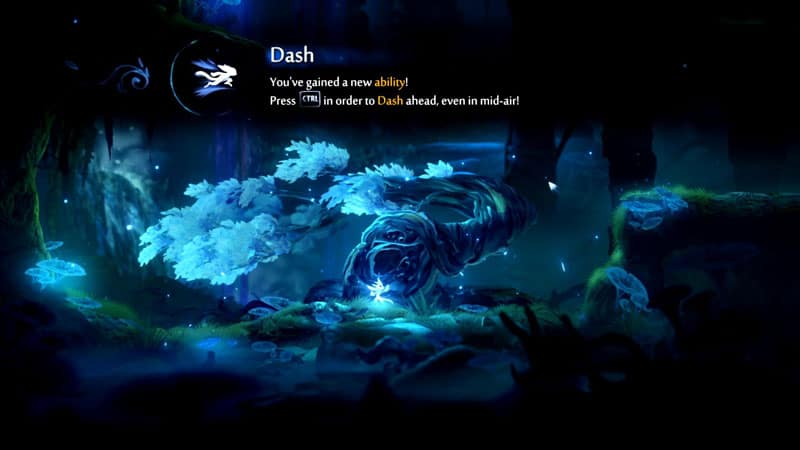
From there, continue moving downwards and you’ll find a glowing tree. Absorb and get yourself a new ability, Dash. As the name suggests, it will allow Ori to dash forward and will allow you to move at a great distance while in mid-air or inland.
Item(s) you can get: 3x Spirit Light Container, Kwolok’s Hollow Map, New Spirit Shard
From the glowing tree, move to the right. There a couple of boulder traps here but don’t just dash your way across it. Instead, use your dash once then quickly drop down to the ledge you’ll see at the center.
If you are successful, you should be able to get a giant spirit light container that will give you a whopping 200 spirit light orbs. Once you get it, quickly move to the right so you won’t get crushed by the trap.
Once you’re on the next area, use double jump and then dash to reach the upper platform to your right. Work your way up doing the same routine until you reach the top and land on a solid platform.
Once there, the correct destination is to drop down to the area to your left. But don’t go there just yet. Instead, jump and cling unto the wall at your upper left. Crawl all the way up and then jump to the rock at your right.
From there, slowly drop yourself then use double jump and dash to cling to the hanging vine to your right. Go up a little and then jump to the platform to your right to get another spirit light container.
Now, continue moving leftwards until you see a giant beetle monster. From there, work your way up and move to the left. You will find a ledge where you can drop down but don’t go down just yet. Instead, continue moving to the left then jump and you should discover a secret path leading you to yet another spirit light container.
Once you get, proceed to the ledge and dropdown. Go left and you should be back to the same path before the gate to the glowing tree. Use the double jump and dash ability to reach the upper platform to your left. Our goal is to move our way back up to the areas we couldn’t reach before without the dash ability.
Once you’ve reached a solid platform at the top, go left. From there, the same drill, use your double jump and dash ability to work your way up. At the very top, you should now be able to get to Lupo using your dash skill. Buy the Kwolok’s Hollow map from him then continue moving to the left until you reach the area with lots of boulder traps.
From here, our first goal is to shoot the blue orb you see in the upper right corner of the area. You want to move close enough just enough to activate the first boulder trap but not close enough to actually get caught on it.
Once it activates, quickly hop on top of the boulder then use double jump to the right. While in mid-air use your Spirit Arc ability and shoot the blue orb. This will open the previously closed path to your left.
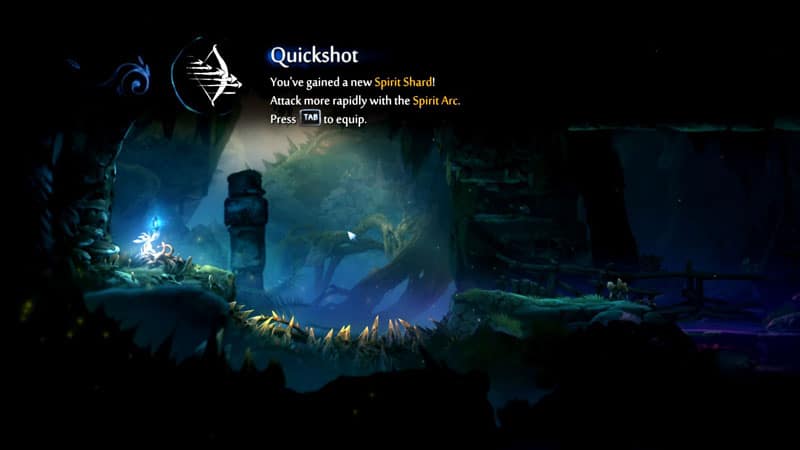
Once it’s open, quickly move to the left while using your dash and double jump ability. At the end of this path, you will get the Quickshot Spirit Shard.
Quickshot Spirit Shard
Spirit Trial Challenge Reward
Item(s) you can get: 1x Life Cell Fragment
From the position of the Quickshot spirit shard, continue moving to the right until you see a jump pad but don’t use it. Instead, use the ledge and use double jump and dash from there so you can cling to the wall to your right. It’s the wall where the snail monster is hanging out.
Work your way up until you reach the upper platform. Kill the giant beetle monster then continue working your way up. At the very top, you will see the altar to start the Spirit Trial. You will also get a Life Cell Fragment in this same area.
You can get 1000 spirit orbs if you manage to beat the ghost Ori during this race challenge. I highly recommend clearing this so you can get the Triple Jump Spirit Shard before you finish the Kwolok’s Hollow map.
RELATED: Life Cell Locations list in Ori and the Will of the Wisps
Spirit Well
Once you beat the challenge, go back down to the area where the jump pad is. Use it to work your way up until you see the extended platform from the blue orb you’ve hit before. Ignore the path to the left as you’ve already been before and there’s nothing to do there anymore.
Instead, shoot the blue orb at the upper left-most corner of the area. Then use double jump and dash to reach the platform it generated.
Continue moving up until you reach the area near the entrance of Kwolok’s Hollow. In the right-most corner of this area, you should see a red orb. You couldn’t reach this platform before but with the dash ability, now you can. Use double jump and dash to reach that platform then shoot the red orb using Spirit Arc. This will open up the Spirit Well (save point) just above you.
Giant Beetle Boss Fight
Item(s): Lots of Spirit Orbs from defeating the boss
Before proceeding, you can go back to Twillen and upgrade some of your spirit shards or buy a new one. If you followed my earlier recommendation, you should have enough spirit orbs to buy the Triple Jump Ability. If not, that’s fine too. You don’t actually need it to fight the boss anyway.
Once you’re ready, proceed to the spirit well and save your game. You now also have the option to warp to any other spirit wells. Since you’ve only activated 2 spirit wells at this point, you can only warp to Inkwater Marsh or Kwolok’s Hollow.
From the save point, continue to the right. Now, it’s time for a little boss fight.
Okay, I’ve been mentioning some giant beetle monsters throughout this walkthrough but I stand corrected. While it’s only right to call them that because they’re bigger than Ori, the boss you are about to face is the real giant beetle.
You can only damage this boss by attacking it from behind.
Here’s a little strategy based on its 3 attacks:
- Shockwave attack – It will stomp the ground generating a shockwave attack similar to the red jumping monster dude.
If you are near when it decides to do this attack, it will generate some distance from you before stomping the ground. Your only option is to use Double Jump to dodge this attack.
Don’t bother to counter-attack when it’s doing this since its front body is covered with hard shells. - Body Slam – This move actually has 2 patterns. One is where it jumps 3 consecutive times and attempts to crush you with its body. You can launch 1-2 attacks with Spirit Smash in between its jump.
The other one is when it charges first in an attempt to gain momentum before jumping and crushing you using its body. This is the best time to counter-attack since it will momentarily stay on the ground whenever it does this. You can easily do 3 spirit smash attacks when it does this.
Simply use your dash skill to move behind it while it is in mid-air. - Horn Attack – At some point, whenever it does the body slam attack, it will try to recover its balance and attack you using its horns. This move though leaves its vulnerable for about half a second. You can launch 1 attack before it completes its horn swing.
Once you defeat it, a quick cut-scene shows the two Mokis dropping a rope so you can proceed to the platform to your right.
Bash Ability
Item(s) you can get: New Ability
Continue moving to the right and you should see a slimy monster dropping a purple fire projectile to wherever your position is.
To your right, you should see a bridge that looks cracked. Use Spirit Smash to destroy it.
If you don’t have it, just position yourself on the bridge at the center and the Slug Monster will drop a projectile on you. Evade it and once the projectile drops there, the ground will collapse giving you access to the lower areas.
Just continue moving downwards while dodging the projectiles. Ignore the jump-pad you’ll see on the left side for now.
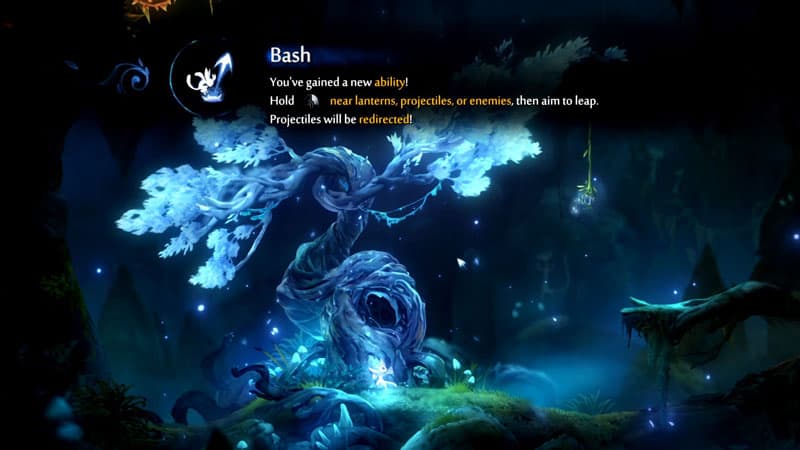
At the very bottom, you will see a glowing tree. Absorb the light and get yourself the new Bash ability.
This ability will allow you to leap toward incoming projectiles, and lamps for enemies. The projectile will also be redirected opposite to the direction Ori will be leaping towards.
Now that we got a shiny new ability, why not get a shiny new spirit shard as well?
Splinter Spirit Shard
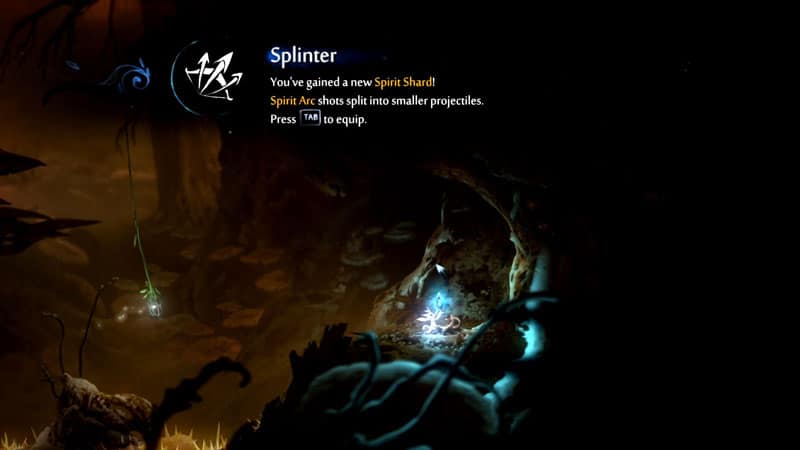
Item(s) you can get: 1x Spirit Light Container, 1x Life Cell Fragment, New Spirit Shard
From the glowing tree, use the lantern to propel yourself upward in a 90-degree position. Then cling to the wall you’ll see at the top. From there, jump to the left and get the spirit light container.
From there, use Double Jump and Dash to reach the upper platform to your right. You will need to go back up using the lanterns with your bash ability until you reach the area with the jump-pad.
Once there, use the jump and redirect the projectile to make it hit the purple rocks blocking the lever just above it. Once it’s destroyed, use the jump pad again to propel yourself into the upper area with the lever. Pull the lever and it will open up a path below.
Go to the new path and then move to the right. There is a path downwards but we’ll ignore it for now. Instead, use the projectiles from the slug monsters to move your way up. At the very top, you will get a Life Cell Fragment.
Now move all the way down to the path we previously ignored the move all the way to the right until you see a path downwards. Go down and you should be in an area full of thorns. The only safe spot is the platform in the middle with a lantern on top of it. To your right, there’s the Splinter Spirit Shard.
Okay, enough detour. Now it’s time to meet Kwolok.
Meeting Kwolok
Item(s) you can get: 1x Energy Cell Fragment, 1x Spirit Light Container,
Go back to the area with the jump pad. Use it and then use the projectiles above to propel yourself to the right. You might need to use double jump and dash on top of the bash ability to successfully land on the platform to the right.
From there, use the projectile to propel yourself towards the lantern. Then use the lantern to propel to the left. Once you land on the platform, use the falling projectiles to launch yourself to the upper left platform.
At the upper rightmost side of this area, you can get an Energy Cell Fragment. To get it, go to the platform below it. Use Triple Jump to cling to the wall at the upper left side.
If you don’t have Triple Jump, it is still possible to get it. Check out my energy cell locations guide to know how exactly you can get it.
Once you got it, go back to the same position before you redirected the projectile. Only this time, launch yourself towards the upper left platform. From there, wait for the slimy monster to drop a purple fire projectile to you. Then use it to launch yourself upwards.
Now that you have the bash ability, you can now go further up. Same drill here, use the projectile from the slimy monster and propel yourself to the right towards the slug monster.
From there, you will see another lantern to your right. Use the projectiles from the slug monster to move towards it. Once you’re in the position where the lantern is, go upwards and ignore the path at the lower right corner for now.
Continue moving upwards using Bash to get the spirit light container.
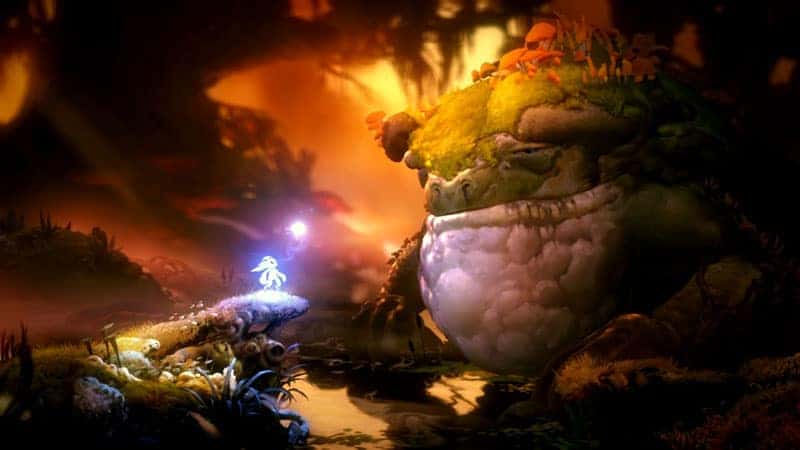
Once you got it, go down and continue to the lower-right path that we previously ignored. Once you’ve reached an even ground, you will see a sign giving directions to Silent Woods (East) and Mouldwood Depths (West). Continue moving to the right and you should finally meet Kwolok.
Congratulations, you just cleared the Guardian of the Marsh main quest. You have also received a new wisp spirit that will increase your max hp and energy.
Furthermore, we now have a new main quest, The Silent Teeth. To finish this quest, we need to go to The Wellspring Glades.
Path to Wellspring Glades
Item(s) you can get: 1x Gorlek Ore
From Kwolok, go left until you are back to the area where you fought the giant beetle. Once you get there, the Mokis will pull a lever that will unlock the path at the upper left platform.
After the quick cutscene, you’ll immediately notice a lamp in front of you. Use triple jump to reach it and then use your bash ability to work your way up so you can get the spirit light container at the top.
Once you acquire it, go back and proceed to the left. Jump and cling to the vine in front of you. Then jump and use your bash ability to the lamp in front of you. Propel yourself at about 70 degrees upwards then use a triple jump so you can cling to the wall next to the light container.
Get it then proceed to talk to the Moki to your left. It will give you the Hand to Hand side quest. This side quest will require multiple steps performed on different maps so it would be better to have a dedicated post for this.
For now, work your way up using your bash ability. To your right, there is a Gorlek Ore beyond a blocked path. To get it, bash the projectile from the slug monster and redirect it to the purple cracked wall blocking it.
Once you got it, continue working your way up. Once you reach the platform at the top. You will notice another purple cracked wall on the upper left side of the area. Same drill for this one. Just redirect the projectile from the slug monster to destroy it.
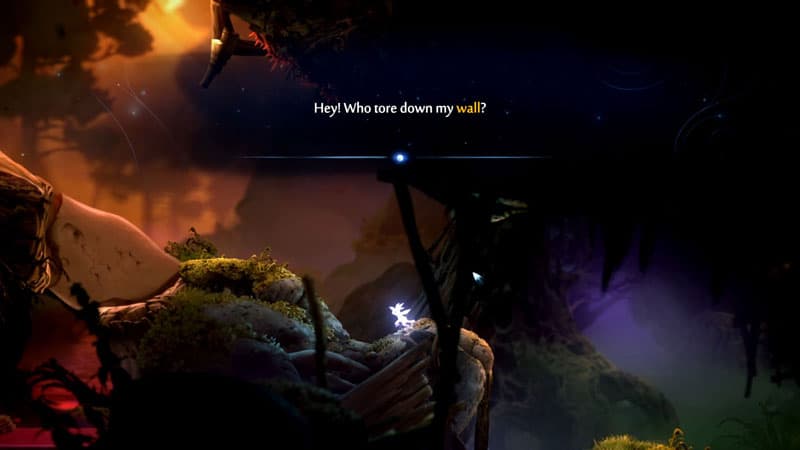
Once you get over the new path, someone will speak asking who tore down his wall and then call you over to meet you.
Past this point, will be The Wellspring Glades map. And while the map completion percentage for Kwolok’s Hollow is not at 100% yet, we’re done with the main walkthrough.
In the next section, I’ll show how you can get attain 100% map completion for this map.
RELATED: Find All 40 Gorlek Ores in Ori and the Will of the Wisps
Area Completion
To get 100% completion in Kwolok’s Hollow, we need to first get some new skills or clear certain maps to gain access to the hidden collectibles.
Below, I have listed the collectibles that we haven’t gotten yet from our first run-through of the main walkthrough. You can click the hyperlink from the item’s name if you need more details on how to get that specific item.
Here is the list of additional collectibles you can get on top of the items we’ve acquired from the main walkthrough:
| Item | Map Screenshot (Click to Enlarge) | Requirements |
|---|---|---|
| Energy Cell Location #9 | 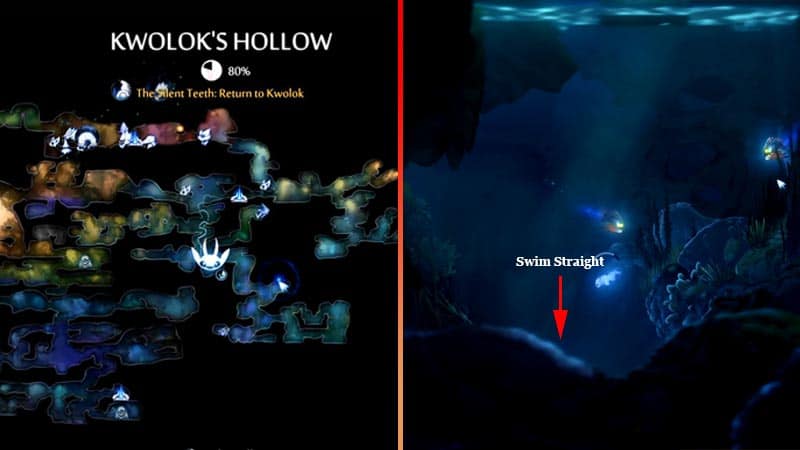 | Clear The Wellspring (Purify the poisoned water) |
| Energy Cell Location #10 | 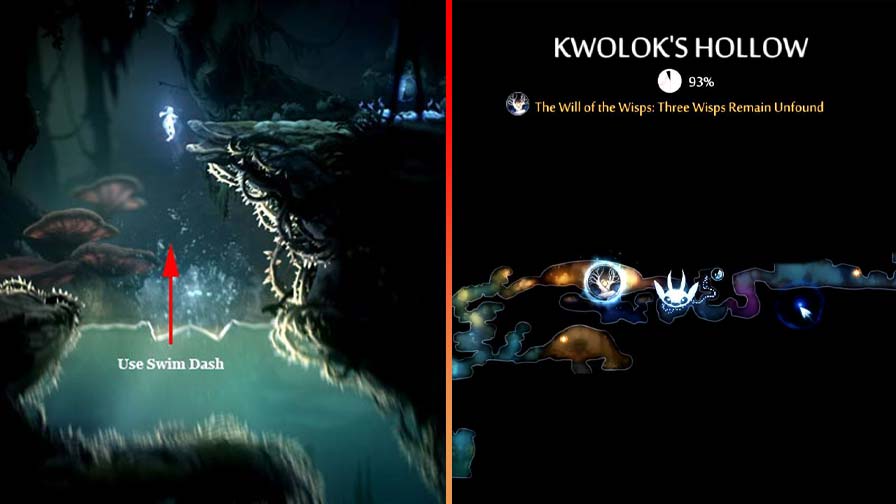 | Swim Dash |
| Gorlek Ore Location #8 |  | Clear The Wellspring (Purify the poisoned water) |
| Spirit Light Container Location #1 |  | Clear The Wellspring (Purify the poisoned water) |
| Spirit Light Container Location #2 |  | Clear The Wellspring (Purify the poisoned water) |
| Spirit Light Container Location #3 |  | Launch |